How to Clean AC Condenser Fins (Different From Coils)
Bent or clogged AC condenser fins cut airflow and spike your electric bill. Clean them yourself in 20 minutes with a $7 fin comb and a garden hose.
Quick answer: Shut off power at the outdoor disconnect box, vacuum loose debris off the fins with a soft brush attachment (always top-to-bottom, never across), rinse from inside out with a gentle garden hose spray, and use a $7 fin comb to straighten any bent sections. The whole job takes 20 minutes and restores airflow without touching the coils or the refrigerant circuit. Do this once a year in spring.
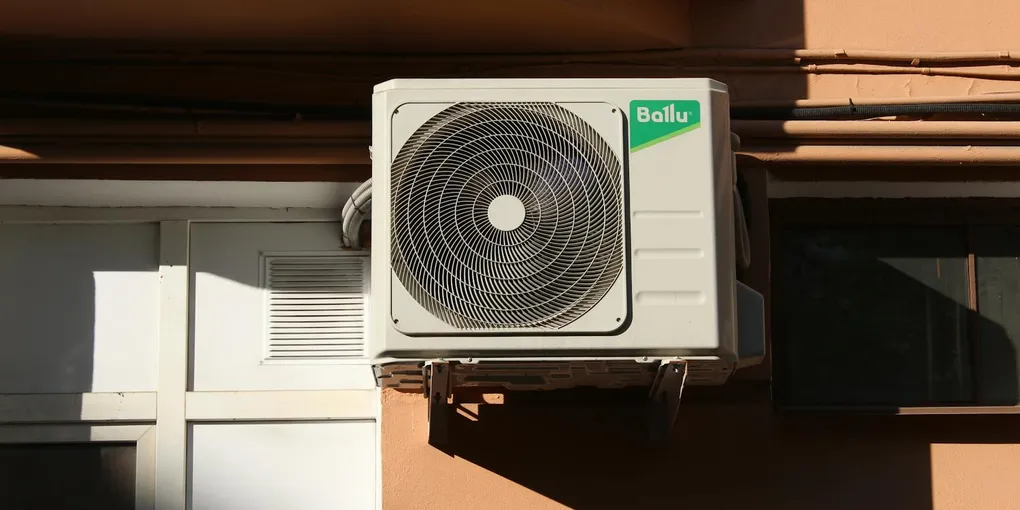
The fins on your AC condenser are the thin aluminum louvers that wrap around the outside of the unit, not the copper coils inside, and not the air filter in your house. They look like corrugated cardboard, and they can get clogged with cottonwood fluff, grass clippings, and dust in a way that cuts airflow to the coil behind them. When that happens, the compressor runs hotter and harder. Your electric bill goes up. On really hot days, the unit can trip on high-pressure fault.
It’s a different job from cleaning condenser coils (the refrigerant tubing inside the unit), though both are worth doing. Fin cleaning is purely mechanical (no chemicals required unless you’ve got a years-long grease layer), and it’s one of the quickest things on the annual AC maintenance list. The other AC maintenance tasks live in the HVAC troubleshooting guide if you want the full picture.
What You’ll Need
- Fin comb (sometimes called an AC fin straightener, about $7 at home centers or online)
- Vacuum cleaner with soft brush attachment
- Garden hose with a gentle spray nozzle (NOT a pressure washer)
- Foaming coil and fin cleaner spray (optional, about $10, only needed for heavy buildup)
- Work gloves (fin edges are sharp)
- Safety glasses
- Screwdriver (Phillips or nut driver, depending on your unit’s top panel screws)
Step 1: Shut Off Power Completely
There are two switches to hit, not one.
First, set your thermostat to OFF or to a temperature that won’t call for cooling while you’re working. Then find the outdoor disconnect box mounted on the wall near the condenser, a gray metal box with a pull-out block or lever inside. Pull the block or flip the lever to cut power to the outdoor unit.
The disconnect box is there specifically so you don’t have to go back inside to the main panel. Use it.
Some units also have a power switch on the unit itself (looks like a light switch in a weatherproof box). If yours has one, flip that too.
Wait about five minutes before touching any part of the condenser. Capacitors inside hold a charge after power is cut, and accidental contact with a charged capacitor is genuinely dangerous. You don’t need to open the unit for fin cleaning, but this habit matters.
Step 2: Clear the Area Around the Unit
Pull weeds, cut back any plants within 18 inches of the unit, and rake away leaves or grass clippings piled against the base. Debris at the base tends to block the very bottom fins, which matters because airflow enters the unit from all four sides.
While you’re down there, look at the fins from a few feet away. You’ll start to notice which sections are clogged with cottonwood or grass, which ones are bent over (they look collapsed flat or pinched), and whether the fins are reasonably uniform around the whole perimeter.
Step 3: Vacuum the Fins
Put the soft brush attachment on your vacuum and run it up and down over the fins, always in the direction of the fins (top to bottom or bottom to top). Never vacuum across the fins; that bends them, which is exactly what you’re trying to fix.
The goal here is to pull loose material (dust, cottonwood, dried grass) out of the fin channels before wetting everything down. Dry vacuuming first means the hose rinse actually gets the fins clean instead of just redistributing the debris into wet clumps.
Go around all four sides. The side facing your grass or any nearby trees will usually be the worst.
Step 4: Straighten Bent Fins
A fin comb is a cheap plastic tool with multiple comb profiles, one for each fin spacing (usually labeled in fins-per-inch, anywhere from 8 to 20 FPI). Carrier and Lennox units tend to run 12-14 FPI on the condenser; Trane often runs 16-18. If you can’t find the spec, pick the comb profile that slides in without forcing.
Line up the comb above the bent section and slide it straight down, aligning the teeth with the fin channels above the damage. Let the comb guide the fins back to parallel. You’ll feel the resistance when the teeth catch bent fins; keep steady pressure moving down and they’ll straighten out. Repeat as many passes as needed.
You won’t get every fin perfect, but getting collapsed sections open even 80% restores most of the airflow you lost. The Energy Star guidance on central AC maintenance notes that condenser maintenance keeps the unit running near its rated efficiency, and that fin condition is part of the standard pre-season checkup.
Step 5: Rinse From the Inside Out
Put the spray nozzle on your garden hose and set it to a gentle fan pattern. Never use a pressure washer. The aluminum fins will fold over under pressure washer force the same way they fold under a tree branch.
Most condensers have a removable top panel (usually 4 screws). Remove it, set it aside, and spray from the inside of the unit outward, pushing debris out through the fins rather than pushing it deeper in. This is more effective than spraying from outside in.
If you can’t or don’t want to open the top, spraying from outside in still works. Just rinse thoroughly so you’re not leaving dislodged material packed against the coil. Use enough water that you can see runoff coming out clean on the opposite side.
Go around all four sides. Let the unit drain for 10-15 minutes.
Step 6: Apply Fin Cleaner for Heavy Buildup
For most annual cleanings, a water rinse is all you need. If the fins have a greasy film (common if the unit is downwind of a kitchen exhaust, near a garage, or simply hasn’t been cleaned in several years), a foaming fin and coil cleaner speeds things up.
Spray it on per the directions (most say to wet the fins first, apply foam, wait 5-10 minutes, then rinse). Nu-Calgon’s Tri-Power or Diversitech’s CoilShine both work well and are available at HVAC supply houses. The aerosol cans at hardware stores work fine too for a once-a-year use.
Rinse thoroughly after any cleaner. Most cleaners are mildly alkaline and not harsh, but residue left on the fins can accelerate corrosion over time.
Step 7: Reassemble and Restore Power
Replace the top panel if you removed it. Reconnect the outdoor disconnect. Wait 5 minutes, then set the thermostat back to cooling mode.
The AC may take a couple of minutes to start (some units have a 3-5 minute delay on startup after a power cut). Once it starts, feel the air coming off the condenser. It should be noticeably warm to hot, which means the unit is pushing heat out. If it starts but runs cold out the top, that’s a separate diagnostic.
Common Mistakes
Using a pressure washer. The number one way to destroy fins. A pressure washer will fold the aluminum louvers flat in seconds. Even a fairly strong garden hose nozzle on “jet” setting can bend fins. Gentle fan spray only.
Vacuuming across the fins. Brush attachments dragged sideways will bend fins just like a pressure washer, only slower. Always move parallel to the fin channels.
Skipping the disconnect box. Cutting power only at the thermostat leaves the condenser electrically live. The disconnect box cuts the circuit at the unit. Use it.
Cleaning just the front face. Fins wrap around all four sides. If you only clean the easy-to-reach front face, the other three sides stay clogged and the unit can’t draw a full airflow column. It’s a 5-minute job to walk the whole perimeter.
Forcing the fin comb. If the comb profile is too coarse for your fin spacing, forcing it will damage more fins than it fixes. Match the teeth to the fin density before you start sliding.
When to Call a Pro
Fin cleaning itself is safe DIY territory. But if you notice any of these while you’re out there, call an HVAC technician:
- Refrigerant oil spots (a rainbow-iridescent oily residue on the fins or around the base): refrigerant leak, requires a licensed tech
- Hissing or bubbling sounds when the unit runs: also suggests a refrigerant issue
- Visible damage to the coil tubing (copper or aluminum lines, not the fins): requires a tech to assess whether a repair is possible
- The fins are so damaged that more than half the surface area is collapsed. At some point fin damage affects the coil and full coil replacement may be needed, which a tech should evaluate
FAQ
What’s the difference between AC condenser fins and coils? The fins are the thin aluminum louvers on the outside of the unit: the corrugated metal surface you can see and touch. The coils are the refrigerant tubing inside, behind the fins. Fins clean with a hose and fin comb. Coils need coil cleaner spray and more care. Both jobs matter, but they’re separate steps and you don’t need to do them at the same time.
How often should I clean AC condenser fins? Once a year in spring is the standard interval. If you have cottonwood trees, a lot of lawn mowing near the unit, or a dusty yard, check mid-season too. A quick visual inspection every month during cooling season takes 30 seconds and tells you whether it needs an early rinse.
Can I bend AC fins back after they get crushed? Yes, that’s exactly what a fin comb is for. You won’t get every fin perfectly straight, but getting the collapsed section 80-90% open restores most of the airflow. If the damage is severe (a large section of fins completely flattened from a branch or hail), a tech can replace the fin sections, though at some age it may make more sense to evaluate the full unit.
Will cleaning the fins actually lower my electric bill? Dirty fins that reduce airflow by 20-30% cause a measurable efficiency loss. The Department of Energy notes that dirty condenser coils and fins reduce AC efficiency significantly, which on a 15-SEER unit running at reduced capacity translates to measurably higher cooling costs. Cleaning them is one of the few maintenance steps that produces a visible result the first summer you do it.
What fin comb should I buy? The $7-10 plastic universal fin combs sold at home centers (Lowe’s, Home Depot) work fine for a once-a-year use. They usually include 8-10 different profiles to match different fin densities. If you want something more durable, the HVAC parts suppliers carry steel combs for about $15. Check your unit’s specs for fins-per-inch if you want to be precise, or just try profiles until you find the one that slides cleanly.
Is it safe to spray water inside the condenser? Yes, with a gentle nozzle. The electrical components are enclosed in a sealed compartment (the section with the capacitor and contactor). The fins and coil area is designed to handle rain and water. Just don’t spray water directly at the sealed electrical compartment. Spray the fins and coil area only.
What if my condenser fins look OK but the AC still runs warm? Fins are one piece of the puzzle. If the fins are clean and reasonably straight but the AC is still struggling, the next things to check: the air filter in the house (a clogged filter restricts airflow just as much as dirty fins), whether the condensate drain is flowing freely (a clogged condensate line can trip the float switch and cut compressor output), and whether the AC is actually low on refrigerant, which is the most common cause of warm air from a running AC.
Conclusion
Cleaning condenser fins is a 20-minute job that most homeowners skip because it’s not obvious from the outside that it matters. You can’t easily see clogged fins the way you can see a dirty air filter. But a condenser running with 30% of its fin area blocked is working harder and cooling less efficiently all summer. A fin comb costs $7. Fifteen minutes once a year is the maintenance schedule.
While you’re out there, add the condensate drain line to the same spring maintenance visit. The 60-second flush prevents the most common summer AC shutdown. Both jobs together take under an hour and cover most of what goes wrong with an AC unit on a hot July afternoon.