How to Repair Concrete Patio Cracks (DIY Guide)
Concrete patio cracks let water in, freeze in winter, and get worse fast. Step-by-step fix for hairline cracks, wide cracks, and crumbling edges, using $10 in materials.
Quick answer: To repair concrete patio cracks, match the product to the crack width. Hairline cracks (under 1/8 inch): run a tube of self-leveling crack sealer along them and smooth with a wet finger. Wider cracks (up to 1/2 inch): wire-brush inside clean, dampen, then press concrete patch product in. Cracks deeper than 1/2 inch need backer rod foam first to support the patch. Keep damp 24 hours to cure, and seal the patio every few years to prevent new cracks.
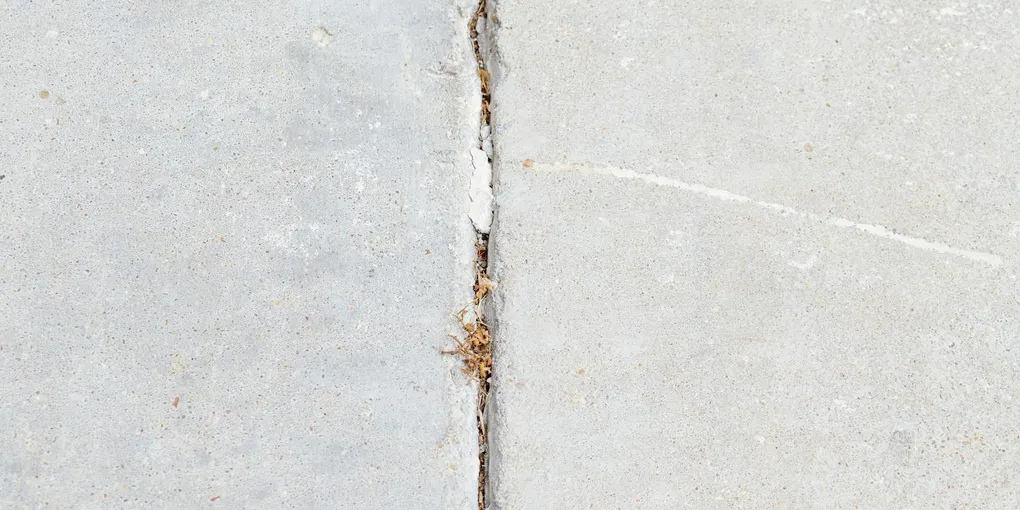
Concrete patios crack, even quality ones. As temperatures swing and the ground shifts, hairline cracks appear, widen, and eventually let water in. That water freezes in winter, expands, and turns small cracks into big ones. Repairing concrete patio cracks promptly prevents that escalation. The fix takes an afternoon, costs about $10 in materials, and adds years to the patio’s life.
Our back patio has a hairline that runs from the southwest corner toward the door. I’ve patched it twice with Quikrete self-leveling crack sealer ($7 a tube). The first patch lasted about a year and a half. The second one came open after one bad freeze-thaw cycle. Something is moving slightly underneath, and I’ve decided I’m fine repatching it every couple of years instead of replacing the whole slab. Sometimes the right call on a moving crack is: maintain it.
What You’ll Need
The materials depend on crack width. Buy after diagnosing:
- For hairline cracks (under 1/8 inch): concrete crack sealer in a caulk tube (~$6)
- For wider cracks (1/8 to 1/2 inch): concrete patch product, sand mix, and a putty knife
- For very wide cracks (over 1/2 inch): concrete repair mortar or rapid-set concrete (~$10 per small bag)
- For crumbling edges: vinyl concrete patcher or quick-setting cement
Plus:
- Wire brush
- Stiff shop broom
- Garden hose with sprayer
- Putty knife or trowel
- Caulk gun (for sealer tube)
- Bucket and stir stick
- Spray bottle of water
- Work gloves and safety glasses
Step 1: Assess the Damage
Look at your cracks carefully, the right repair depends on what you’re dealing with.
- Hairline crack (less than 1/8” wide, surface only): Easy fix. Crack sealer tube.
- Wider crack (1/8” to 1/2”): Patch product with backer rod for deep ones.
- Wide and deep (over 1/2”): Concrete repair mortar in layers.
- Crumbling edges or corners: Vinyl concrete patcher rebuilds the missing material.
- Heaving cracks (one side is higher than the other): Sub-base failure. Patch will reopen. Consider professional assessment.
- Whole-slab cracks running through the patio: Foundation movement. Patch will keep failing. Replacement or mudjacking is the real fix.
For repair-worthy cracks, continue.
Step 2: Prep the Crack
The most important step. New patch material doesn’t bond to dirty concrete.
- Use a wire brush to scrub the inside of the crack, get loose concrete, dirt, and debris out.
- For deep cracks, also chisel out any loose chunks with a screwdriver.
- Vacuum or sweep all debris out of the crack.
- Rinse with a garden hose, water cleans out fine particles.
- Let it dry to “damp but not wet”, about 1 hour on a sunny day. Concrete patches bond best on a slightly damp surface.
A clean, properly damp surface is what makes the difference between a 10-year repair and a 1-year repair.
Step 3: Hairline Crack Repair (Under 1/8”)
For thin surface cracks:
- Load a tube of concrete crack sealer (or “self-leveling crack filler”) into a caulk gun.
- Cut the nozzle tip at a 45-degree angle to match the crack width.
- Run a bead along the crack, slightly overfilling.
- Smooth with a wet finger or a putty knife.
- Wipe excess with a damp rag.
- Let cure per the package, usually 24 hours before walking on, 72 hours for water exposure.
This is the right product for cosmetic cracks. It stays slightly flexible, which prevents re-cracking when the slab moves seasonally.
Step 4: Medium Crack Repair (1/8” to 1/2”)
For cracks you can see down into:
- For cracks deeper than 1/2 inch, push backer rod (a foam cord, sold in the masonry aisle) into the crack first. Sized so it sits about 1/4 inch below the surface. This gives the patch something to push against and prevents you from filling 6 inches of crack with patch material.
- Mix the concrete patch per package instructions. Aim for peanut butter consistency.
- Press the patch into the crack with a putty knife or trowel. Push down firmly to fill voids and avoid air pockets.
- Smooth the surface level with the surrounding concrete.
- Texture to match the surrounding patio, if the patio is smooth, smooth the patch. If it’s broomed or stamped, drag a damp broom or sponge across the wet patch to match.
- Cure, keep the patch damp by misting with a spray bottle every few hours for the first day. Concrete cures by chemical reaction, not by drying, moisture helps. Cover with plastic if it’s hot or windy.
Step 5: Wide / Deep Crack Repair (Over 1/2”)
Same approach as medium, but build up in layers:
- Backer rod for the deepest portion.
- First layer of patch, fill about half the depth.
- Wait 30 minutes for it to firm up (not fully cure).
- Second layer, fill flush with the surface.
- Smooth, texture-match, cure.
For very wide cracks (over 1 inch), repair mortar mixed slightly drier holds better than thin patch products.
Step 6: Crumbling Edge Repair
When the edge of the patio has chipped or crumbled away:
- Remove all loose material. Tap the area with a hammer, anything that pops out, remove. You want to be patching solid concrete.
- Brush and vacuum the cavity.
- Mist with water, slightly damp surface.
- Mix vinyl concrete patcher (better than standard mix for edge repairs, bonds aggressively to existing concrete).
- Build a temporary form if needed, a piece of scrap wood pressed against the edge holds the patch material until it sets.
- Press the patch material into the cavity. Pack it in firmly.
- Smooth flush with surrounding concrete.
- Remove the form after about 1 hour (once the patch is firm).
- Final smoothing with a damp sponge.
- Cure as in Step 4.
Step 7: Seal the Whole Patio
After patches cure (give them 7 days), apply a concrete sealer to the whole patio. This:
- Hides slight color difference between patch and original concrete
- Prevents water absorption (the main cause of future cracking)
- Adds a unified finish
Concrete sealer is rolled or sprayed on. About $25 for enough product to cover a small patio. Reapply every 3-5 years for best protection.
Common Mistakes to Avoid
Patching a wet crack. Standing water in the crack prevents the patch from bonding. Wait for dry conditions, or sponge water out.
Patching a moving crack with rigid material. If the slab is still actively moving, a rigid concrete patch will crack again in the same spot. Use a flexible sealant on active cracks instead.
Skipping the wire brush prep. New material doesn’t bond to dust and loose debris. Always prep thoroughly.
Patching in extreme heat or cold. Below 40°F or above 90°F, concrete patches don’t cure properly. Aim for 50-80°F.
Walking on the patch too soon. 24 hours minimum for foot traffic, 72 hours for vehicles. Cure time is what it is, you can’t cheat it.
Ignoring the underlying cause. If your patio has tree roots growing under it or the soil has settled, patches will keep failing. Address the cause or accept that you’re doing this every few years.
When to Replace Instead of Repair
- Cracks wider than 2 inches OR with one side noticeably higher
- Multiple major cracks across the slab
- Sub-base has settled (visible dip in the patio)
- Patches keep failing after multiple repair attempts
- The patio is old (30+ years) and deteriorating in multiple places
Concrete replacement is $6-12 per square foot installed. Concrete leveling/mudjacking (raising a sunken slab) is cheaper at $4-7/sq ft. Repair is $10 + an afternoon. The break-even depends on how bad the damage is.
Frequently Asked Questions
Why do new concrete patios crack? All concrete cracks eventually, that’s just how it behaves. Quality installers use control joints (the lines you see cut into a patio) to control WHERE it cracks. Cracks within the control joints are normal. Cracks across them indicate a bigger issue.
Can I tint the patch to match my concrete color? Yes, concrete pigment is sold in small bottles at home centers. Add per the patch product instructions before mixing. Color matching is approximate; sealing the whole patio after evens it out.
My patio is stamped or stained. Will the patch be visible? Yes, somewhat. For decorative concrete, a stained or stamped repair is a specialist job. DIY repairs will be visible.
How long does a properly done concrete patch last? For a static, non-moving crack: indefinitely if cured and sealed. For an actively moving crack: 2-5 years before the patch may reopen and need redoing.
Can I use regular concrete from a 60lb bag instead of patch product? Not effectively. Regular concrete doesn’t bond to existing concrete well. Patch products contain bonding agents that solve this. Spend the extra $4 for the right material.
When is the best time of year to patch concrete? Late spring through early fall, when temperatures are steady between 50 and 80°F. Below 40°F the curing reaction slows and the patch stays weak; the product may harden on the surface while staying soft underneath. Above 90°F in direct sun, the surface dries faster than it cures and the patch ends up brittle. If your patio sits in full afternoon sun, do the repair in the morning and shade the wet patch with a piece of cardboard for the first few hours to slow the surface cure. In cold climates, September is typically your last clean window before freeze-thaw season starts. Any open crack that holds water going into November will be noticeably wider by March.
Concrete cracks are inevitable but manageable. The key is catching them while they’re small, a hairline crack is a 30-minute fix; a 1-inch fissure is a half-day project. Walk your patio twice a year, hit any new cracks with a tube of sealer, and reseal the whole surface every few years. With minimal effort, a concrete patio can stay solid for 30+ years.