How to Remove a Stuck Shower Cartridge (Without Breaking the Valve)
A stuck shower cartridge frees with the right tool, not more force. Penetrating oil, a cartridge puller, and patient heat fix nine out of ten. Avoid the channel-lock move that turns a $15 part into a $400 wall repair.
Quick answer: A stuck shower cartridge usually frees with three things working together. Spray penetrating oil (PB Blaster or Liquid Wrench) into the cartridge stem and let it sit 30 minutes. Then thread a brand-specific cartridge puller onto the stem and tighten the puller’s nut against the valve body. For a cartridge that’s mineral-locked, alternate a hair dryer on the valve body with an ice pack on the stem to break the seal. Avoid channel locks and Vise-Grips, they round off the stem and turn a $15 part into a $400 wall-repair job.
A shower cartridge that won’t come out is one of the most frustrating plumbing problems, and one of the easiest to make worse. The cartridge sits inside a brass valve body, sealed by two O-rings and a layer of plumber’s grease that hardens into something like cement after a few years. Hard water deposits add a mineral crust. The cartridge is brass, the valve body is brass, and brass-on-brass with mineral buildup grips like welded metal.
You can’t muscle a stuck cartridge out. The valve body splits before the cartridge moves, and once the body splits, you’re cutting tile out of the wall to replace the whole rough-in valve. That’s a real job. The procedure below is the same one Moen, Delta, and Kohler tech support walk you through over the phone. Tools, patience, and chemistry, in that order.
Why It’s Stuck
Three things lock a cartridge in place:
- Plumber’s grease that has hardened. When the cartridge was installed (anywhere from 5 to 25 years ago), the installer smeared a thin coat of grease on the cartridge body. Over time, the grease oxidizes and turns into a glue-like film.
- Mineral deposits. Hard water leaves calcium and magnesium scale around the O-rings. The scale is essentially limestone, dissolved by acid (vinegar, CLR) but not by force.
- Galvanic corrosion. Where the brass cartridge contacts the brass valve body, slow electrochemical bonding happens over years. This is the hardest of the three to break.
The fix is to attack all three at once. Penetrating oil for the grease, vinegar or CLR for the mineral, heat for the corrosion.
What You’ll Need
- A new cartridge that matches your faucet brand and model (research before you start, model numbers below)
- A brand-specific cartridge puller, $15-35
- Moen valves: Moen 104421 or 13775 puller
- Delta valves: Delta RP1001 puller (older) or the included puller in newer Delta repair kits
- Kohler valves: Kohler 1228470 puller, or a universal pin puller
- Price Pfister: Pfister 920-200 puller
- Penetrating oil, PB Blaster, Kroil, or Liquid Wrench
- A hair dryer (for heat)
- Optional: a small ice pack or freezer spray
- An Allen wrench set (the handle is held on by one)
- Flat and Phillips screwdrivers
- Channel-lock pliers, ONLY for the trim plate, NOT the cartridge stem
- White vinegar or CLR for mineral buildup
- A rag, a small bucket, a flashlight
Note: a universal cartridge puller (the kind that thread onto any 1/2 inch stem) works on most cartridges but applies force less evenly than a brand-specific puller. For a really stuck cartridge, spend the $20 on the right one.
Step 1: Shut Off the Water and Drain the Lines
- Find the main water shutoff, usually in the basement, garage, or near where the water line enters the house. Turn it clockwise until it stops. If you haven’t located it before, our guide to shutting off water to the house covers the common locations and what the valve looks like.
- Open the shower valve and let any remaining water drain out.
- Open a faucet on a lower floor (or the basement) to drain pressure from the hot water lines.
- Cover the shower drain with a rag, you don’t want a dropped screw heading down it.
Some homes have shutoffs built into the back of the shower valve (small slots accessible through the trim plate, common on Delta and some Moen models). If yours does, you can shut just the shower instead of the whole house. Look for two slotted screws near the cartridge after you remove the trim.
Step 2: Remove the Handle
This is where most DIY jobs hit their first wall. The handle is held on by one small set screw, usually 1/8 inch Allen, usually behind a decorative button or under the lever itself.
For a normal handle:
- Find the set screw. On a single-lever Moen, it’s underneath the lever (push the lever up). On Delta, it’s on the underside or the back. On Kohler, often hidden behind a small button cap that pries off with a flathead.
- Loosen the set screw with the matching Allen wrench. Don’t remove it fully, just back it out enough to free the handle.
- Pull the handle straight off. Wiggle if needed.
For a stuck handle (Reddit’s most-common stuck-cartridge scenario): the set screw rounds off, or the handle is fused to the cartridge stem.
- Stuck Allen screw: spray penetrating oil into the socket, let it sit 30 minutes, try again with a slightly larger Allen wrench wedged in (the next size up bites into the rounded edges). Last resort, drill the screw out with a left-hand drill bit, the bit grips the screw as it spins and backs it out.
- Handle fused to stem: after removing the set screw, wedge a wide putty knife behind the handle and tap it gently with a hammer to lift the handle off the stem. Do NOT pry against the wall tile, you’ll crack it. Pry against the brass valve body if possible.
Step 3: Remove the Trim Plate and Spacer
Behind the handle is a decorative trim plate (sometimes called the escutcheon). It’s usually held on by two screws or a single threaded ring.
- Unscrew or unthread the trim plate.
- Pull it off. Caulk may hold it to the wall, score the caulk with a utility knife if it doesn’t pop free.
- Behind the trim plate is sometimes a plaster guard or a sleeve. Slide it off.
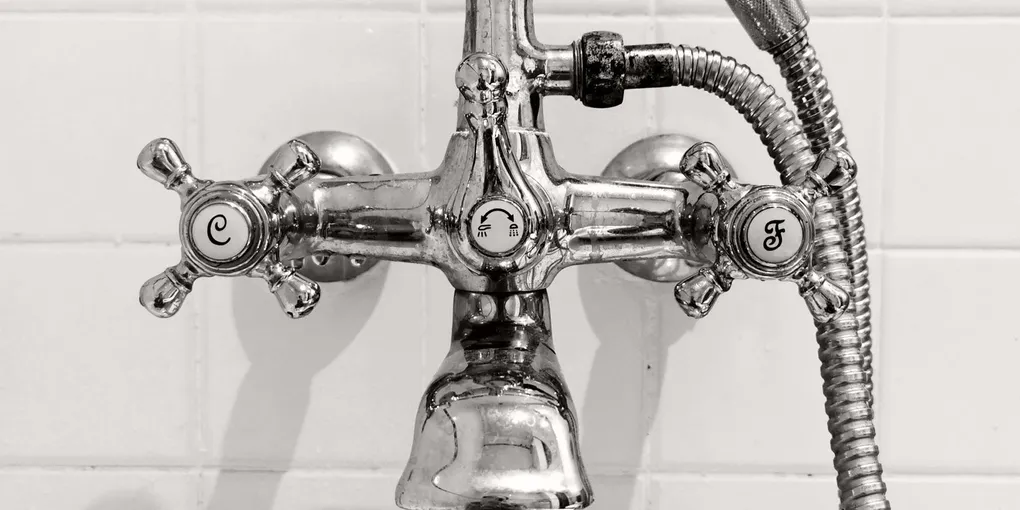
You should now see the cartridge stem (a brass cylinder sticking out from the valve body) and a retaining clip, ring, or nut holding it in place.
Step 4: Remove the Retaining Clip or Nut
Every cartridge is held in by something:
- Moen: a brass U-shaped clip that pulls out the top with needle-nose pliers
- Delta: a hex retaining nut threaded onto the valve body, unscrewed with channel locks (gripping the nut, NOT the cartridge stem)
- Kohler: a threaded retaining ring
- Price Pfister: a screw-on retaining nut similar to Delta
Pull, unthread, or unscrew whatever is holding the cartridge in. Set it aside in a labeled cup, you’ll need it for reinstallation.
If the retaining nut itself is seized, hit it with penetrating oil and wait. Don’t snap it off.
Step 5: Apply Penetrating Oil and Wait
This is the step that gets skipped most often, and skipping it is what breaks cartridges.
- Spray penetrating oil generously into the cartridge stem socket and around the cartridge body where it meets the valve body.
- Set a timer for 30 minutes. Walk away.
- Come back, spray again, wait another 30 minutes if the cartridge is particularly old (10+ years).
Penetrating oil works by capillary action, it seeps into the microscopic gap between the cartridge and valve body and breaks the grease-and-mineral bond. Skipping this step means you’re pulling against the full bond strength.
Step 6: Pull with a Cartridge Puller
A cartridge puller is essentially a slide hammer plus a threaded shaft. The shaft threads onto the cartridge stem, the puller’s outer collar braces against the valve body, and a nut on the shaft pulls the cartridge straight out as you tighten it.
- Thread the puller onto the cartridge stem. Most pullers have a 1/2 inch internal thread that matches a standard cartridge stem.
- Position the outer collar so it sits against the valve body, not against the tile wall.
- Turn the nut on the puller’s shaft clockwise. The cartridge should start to slide out.
- Keep turning. The cartridge moves slowly at first, then suddenly frees and slides the rest of the way.
If the puller turns and turns with no movement, the cartridge isn’t yielding to mechanical force alone. Time for heat.
Step 7: Apply Heat (for Mineral-Locked Cartridges)
Mineral deposits and corroded brass don’t yield to oil and force. They yield to thermal cycling, the metals expand at different rates and the bond cracks.
- Aim a hair dryer at the valve body (the brass piece in the wall, not the cartridge stem). Run it for 5-7 minutes until the brass is hot to the touch but not painful.
- Apply an ice pack to the cartridge stem (or use freezer spray, $5 at any electronics store). The stem contracts while the body stays hot.
- While the temperature differential is still present, turn the puller again. The cartridge often pops free at this point with a noticeable click.
- Repeat the heat-cold cycle once or twice if needed.
When to Stop and Call a Plumber
If the cartridge still won’t move after:
- 30+ minutes of penetrating oil
- Full force on a brand-specific cartridge puller
- Two heat-cold cycles
- Inspecting the cartridge stem for cracks (a cracked stem can’t be pulled, the puller threads strip)
Stop. You’re now in the zone where pushing harder will split the valve body, and that means cutting tile to access the rough-in plumbing. A plumber has a slide-hammer puller with more force and access to specialty tools (a Delta repair kit, a Moen reseating tool) that homeowners don’t keep around.
A plumber’s house call to extract a stuck cartridge runs $150-300 depending on local rates. A complete valve body replacement (including tile work) runs $800-2,000. The cost gap is why the “call the plumber” decision is the right one before things escalate.
Common Mistakes to Avoid
Gripping the cartridge stem with channel locks or Vise-Grips. This rounds off the stem and destroys the only thing the puller can grab. Pliers go on the retaining nut or trim plate, never the cartridge stem.
Skipping the penetrating oil soak. Pulling cold against a 10-year mineral-and-grease bond is what cracks valve bodies. On anything older than ten years, give it the full 30 minutes, that’s what the mineral bond needs to release.
Prying against the wall tile. A putty knife or pry bar pressed against the tile cracks the tile. Always pry against the brass valve body.
Using a “universal” puller on a brand-specific cartridge. Moen cartridges have a particular shape that brand-specific pullers grip evenly. Universal pullers grip one face only and can torque the cartridge sideways, jamming it harder.
Turning the water back on before the new cartridge is fully seated. A partly-seated cartridge leaks at 60 PSI and floods the wall before you notice. Press the new cartridge fully in, retaining clip back in place, before opening any valve.
Forgetting which way the cartridge faced. Most cartridges have a “hot” side and an “up” arrow. Install rotated 180 degrees and the hot and cold reverse. Take a phone photo before you pull the old one.
Frequently Asked Questions
How do I know which cartridge brand and model I have? The trim ring on the front of the valve usually has a brand name (Moen, Delta, Kohler, Pfister) molded into it. Once you know the brand, take a photo of the cartridge before pulling it (or after if you can get one out) and search “[brand] cartridge identification” on the manufacturer’s site. Moen has a tool at moen.com/cartridge-finder, and Delta has a similar one at deltafaucet.com.
The cartridge stem broke off when I tried to pull it. What now? The puller can’t grab a broken stem. A pin extractor (a small tool with hardened teeth that bite into the broken brass) sometimes works, otherwise the rough-in valve has to be cut out and replaced. Time to call a plumber.
My faucet is dripping but I can’t get the cartridge out. Should I just live with it? A small drip costs $1-3/month in wasted water. A small drip that lasts a year stains the tub and grows mineral scale. If you can’t extract the cartridge yourself after the steps above, a plumber’s $200 visit stops it.
Can I leave the old cartridge in and just clean it? On some Moen 1225 cartridges, yes, you can clean the cartridge in vinegar without removing it from the valve body. Most cartridges (Delta, Kohler, Pfister) need to come out for any service. Check the manufacturer’s instructions for yours.
Why does the same shower cartridge keep failing? Hard water is the most common cause, calcium scale destroys the seals every 3-5 years instead of the 10-15 they’re rated for. If you have hard water (over 7 grains per gallon), a whole-house water softener doubles or triples cartridge life. Brand-name cartridges (Moen, Delta, Kohler) outlast generic replacements by 5-10 years on average.
How long do shower cartridges typically last? Brand-name cartridges (Moen, Delta, Kohler) are rated for 20+ years under normal water conditions, and they often reach that in homes with soft or treated water. In hard water areas (above 7-8 grains per gallon), real life is often 7-12 years before the O-rings wear through or mineral scale seizes the body. Kohler single-control cartridges tend to be the shortest-lived of the major brands in hard water. Moen’s 1225 and 1222 cartridges hold up especially well and are covered under Moen’s lifetime warranty, so the $15-25 replacement cost is the only expense if you can extract the old one yourself. If you’re seeing white buildup on your showerhead and faucet aerators, assume your cartridges are on the shorter end of that range.
Penetrating oil overnight, the right brand-specific puller, and heat if the cartridge is mineral-locked, and the $15 part comes out without splitting the valve body. The force approach is what turns a homeowner repair into a tile job. For other faucet repairs where the cartridge does come out, our leaky faucet drip and bathroom faucet replacement guides cover the reinstallation side.