How to Replace a Bathroom Faucet (Step-by-Step)
Replace your bathroom faucet in under an hour with basic tools. Complete guide covering single-hole, widespread, and centerset faucets, plus the pitfalls that turn a simple swap into a long afternoon.
Quick answer: To replace a bathroom faucet, match it to your sink’s hole configuration, single-hole, centerset (3 holes 4” apart), or widespread (6-16” apart). Shut off both under-sink valves, disconnect the supply lines, use a basin wrench to reach the nuts behind the sink, and remove the old faucet. Clean the deck, set the new one, hand-tighten plus a quarter turn, wrap plumber’s tape on supply threads, and test for leaks. A basin wrench is essential, the $15 tool that makes this job possible and miserable at the same time.
Replacing a bathroom faucet is a 45-60 minute job with basic tools and the right new faucet. You save $200 in labor over hiring a plumber, and you get to pick exactly the style you want instead of whatever the contractor has in his truck. If your old faucet is leaking instead of dead, the repair guide may be the better start.
I bought our current bathroom faucet at eleven-thirty one night during a forty-percent-off blowout on a discontinued matte black finish. Megan was half asleep next to me when I clicked the buy button. She mumbled, “If it’s ugly I’m divorcing you.” The next Saturday I laid the new faucet, supply lines, plumber’s tape, basin wrench, and a headlamp out on a towel and went underneath. The old nuts were seized; penetrating oil and a sandwich finally got them moving. The new handles felt smooth, the spout was perfectly centered. I texted her a photo and got back three heart-eye emojis and “you may stay married to me.” That faucet’s been running clean ever since.
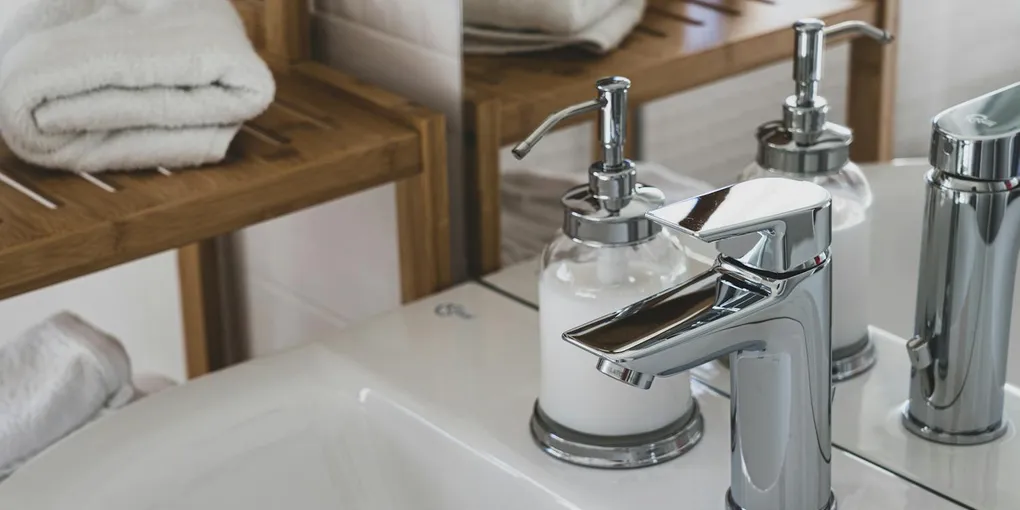
Three common configurations to cover: single-hole, centerset, and widespread. Each has the same general flow with a couple of specific differences. The small mistakes turn a one-hour swap into a three-hour mess, so I’ll flag those as we go.
What You’ll Need
- Replacement faucet (matching your sink’s hole configuration, see below)
- Adjustable wrench
- Channel-lock pliers
- A basin wrench (~$15), the one tool that makes this job possible
- A flashlight or headlamp (the cabinet under the sink is a cave)
- Plumber’s tape (PTFE / Teflon tape)
- A bucket and old towels
- A flathead screwdriver
- Penetrating oil (for stuck old nuts)
- Optional: silicone caulk if the new faucet doesn’t include a base gasket
Step 1: Identify Your Faucet Configuration
Before you buy anything, look at your sink from above. The number and spacing of the holes determines what faucet you can buy. Stand at the sink and count.
- Single-hole faucet, one hole. The whole faucet is one piece.
- Centerset faucet, three holes, with the outer two spaced 4 inches apart (center to center). The faucet body covers all three.
- Widespread faucet, three holes, with the outer two spaced 6-16 inches apart. Handles and spout are three separate pieces.
- Wall-mount faucet, no holes on the sink itself; the faucet comes through the wall behind it.
Stick with the same configuration when replacing. Three holes 4 inches apart = centerset or single-hole-with-deck-plate. Don’t try to put a widespread in a centerset hole pattern, the math doesn’t work.
Step 2: Turn Off the Water and Clear Under the Sink
- Find both shut-off valves under the sink, one for hot, one for cold. Usually small chrome or plastic valves at the base of the supply lines.
- Turn each clockwise until they stop.
- Open the existing faucet to drain remaining pressure and confirm the water is fully off.
- Clear everything out from under the sink. You need elbow room.
- Put a bucket and an old towel under the work area, there will be drips.
A headlamp here is worth more than another flashlight. Hands free is a different job than holding a light in your teeth.
Step 3: Disconnect the Old Faucet
Working under the sink:
- Disconnect the supply lines from the bottom of the faucet using an adjustable wrench. There’s usually a swivel nut. Disconnect both hot and cold.
- Loosen the mounting nuts that hold the faucet to the sink. This is where the basin wrench earns its keep. These nuts are deep under the sink in a tight space and impossible to reach with a regular wrench.
- If the nuts are corroded and won’t budge, spray them with penetrating oil, wait 10 minutes, try again. The penetrating oil + a sandwich is the standard trick, patience does more work than force here.
- If your faucet has a pop-up drain assembly connected, disconnect the lift rod (a small set screw) and the horizontal pivot rod from the drain pipe.
- Once everything is disconnected, the faucet lifts straight up out of the sink. If it’s stuck from years of caulk or hard water, gently work it free.
Step 4: Clean the Sink Deck
Before installing the new faucet, scrub the area around the holes. Years of soap scum, dried caulk, mineral deposits, and gunk will be there. A new faucet on a dirty surface won’t seal well and looks bad. Stiff brush, all-purpose cleaner, dry thoroughly. Five minutes you won’t regret.
Step 5: Install the New Faucet
Read the manufacturer’s instructions for your specific model, they vary slightly. The general flow:
For a single-hole or centerset faucet:
- Place the gasket or rubber seal that came with the faucet onto the sink deck.
- Drop the faucet through the hole(s) with the supply lines and mounting studs going down.
- From below, slide on any washers and thread on the mounting nuts. Hand-tight first, then snug with the basin wrench. Don’t crank, overtightening cracks ceramic sinks.
- Connect the supply lines to the shut-off valves. Wrap a few turns of plumber’s tape clockwise around the threads before threading the supply line nut on. Hand-tight plus a half turn with a wrench.
For a widespread faucet:
- The three components (two handles and a spout) install separately. Spout in the center hole, handles in the outer two.
- There’s a T-connector under the sink that links the two handles to the spout, install it per the diagram in the box.
- Otherwise same as centerset: mounting nuts from below, supply lines to shut-offs.
For all types:
Make sure the spout is centered correctly over the sink before fully tightening the mounting nuts. Easy to crank everything down and then notice the spout is rotated 10 degrees off.
Step 6: Install the Drain (If New)
Many faucets come with a matching pop-up drain assembly. If yours did, this is the time to install it.
- Disconnect the old drain by unscrewing the slip nut on the drain trap and the body of the drain from inside the sink.
- Apply a bead of plumber’s putty (or the included rubber gasket) under the lip of the new drain.
- Drop the new drain in from above, secure the locknut from below.
- Connect the lift rod from the faucet to the pivot rod on the new drain.
If your faucet didn’t include a drain, leave the old drain alone.
Step 7: Turn the Water Back On and Test
- Open the new faucet in the fully open position (both hot and cold). This lets air escape as water enters.
- Slowly open the shut-off valves, quarter turn at a time. Listen for hissing or watch for drips.
- Let water run for 60 seconds at full hot, then full cold, to flush any debris from the supply lines.
- Close the faucet and check every joint under the sink with your hand for moisture. Dry, snug joints = success. Watch for a minute, then another minute just to be sure.
If you have a small drip, snug the leaking joint another quarter turn. Don’t overtighten, strip the threads and you start over.
Common Mistakes to Avoid
Buying the wrong configuration. Measure the hole spacing before you go to the store. Specifically the distance from the center of the outer-left hole to the center of the outer-right hole. 4 inches = centerset, 6-16 inches = widespread.
Skipping the basin wrench. A standard wrench cannot reach the mounting nuts on most under-sink installs. Trying to use pliers will damage the nut and frustrate you for an hour. The basin wrench is $15 and a permanent addition to your tool collection.
Overtightening plastic nuts. Most modern faucet mounting nuts are plastic. They need hand-tight plus a quarter turn. Cranking will crack them or strip the threads, and you’ll find out the hard way when it leaks weeks later.
Forgetting plumber’s tape. The threaded connection between the supply line and the shut-off valve relies on plumber’s tape to seal. No tape = slow leak that’s hard to spot.
Leaving the old caulk under the new faucet. If you don’t scrape off the old crusty bead of caulk, the new faucet won’t sit flat. It rocks, wobbles, and the seal fails.
Cross-threading the supply line nuts. The plastic connection nuts on braided supply lines thread together quickly, which also means they cross-thread quickly. Start counterclockwise to seat the first thread, then clockwise to tighten. A cross-threaded nut feels snug but weeps the moment pressure is on it. If the nut goes from smooth to suddenly stiff after one turn, back it out and start over.
Frequently Asked Questions
How long does it take? First time: 60-90 minutes. Once you’ve done it before: 30 minutes flat.
Do I need to call a plumber if my shut-off valves are stuck? If you turn them and water still flows, yes, you’ll need either replacement valves or to shut off the main water to the house to work on them. A stuck valve is more involved than a faucet swap.
Why do my supply lines look different than the new ones? Supply lines vary in length and connection type. Most new faucets come with built-in supply lines or include adapters. Check before you buy. If you need to replace them entirely, braided stainless steel supply lines are inexpensive and last decades.
How do I match the faucet style to my bathroom? Pick the finish first. Chrome, brushed nickel, and matte black are the three most common. Match it to the existing hardware (drawer pulls, towel bars, light fixtures). Mixing finishes looks like a mistake; matching them looks intentional.
What if my old faucet is American Standard / Moen / Delta / Kohler and my new one isn’t? The actual installation is identical, all brands use the same hole patterns. Brand only matters for warranty and replacement cartridges in the future.
What if there are no shut-off valves under my sink? Older homes often have nothing between the faucet supply lines and the main shut-off. Your options: shut off the house main water supply while you do the faucet swap, then add angle-stop isolation valves while you’re already set up under there. They run about $8 each at any hardware store and take 15-20 minutes to install. Doing both jobs in one visit makes sense since you already have the main off and tools out.
A new bathroom faucet changes the room more than the price suggests. The bathroom looks newer immediately. It runs $80-250 for a decent faucet versus a $300 plumber bill. And the next time something drips, you’ll know exactly what’s behind it because you put it there.