Why Is My Outdoor Outlet Not Working? (5 Causes & Fixes)
An outdoor outlet that suddenly stopped working has 5 common causes, most are 5-minute fixes you can do yourself. Press the GFCI reset first, then work through the rest.
Quick answer: An outdoor outlet not working has five common causes. Check the GFCI reset button first, if the outlet has TEST/RESET buttons and RESET is popped out, press it. If the outlet has no buttons, the GFCI is elsewhere (usually the garage or a bathroom), find it and press RESET. Other causes: tripped breaker, something faulty plugged in (unplug, reset, plug back one at a time), or water in the outlet box (turn off the breaker, dry overnight).
An outdoor outlet that won’t power your string lights, pressure washer, or lawn equipment feels like a scary electrical problem but usually isn’t. In about 80% of cases, the fix is pressing a single button. The other 20% involves a tripped breaker, water damage, or a wiring issue that gets a bit more involved.
Safety note: Outdoor outlets handle 120 volts and are exposed to weather. If you’re uncertain at any step, call an electrician. The diagnostic steps below are safe; deeper repair is not.
What You’ll Need
- A flashlight
- A non-contact voltage tester (~$10)
- A flathead screwdriver
- A Phillips screwdriver
- A new GFCI outlet rated for damp/wet locations (if replacement is needed, $15, look for “WR” stamped on the front)
- An outlet tester for confirming proper wiring after replacement ($8)
- Optional: a small lamp or phone charger to test with
Step 1: Check the GFCI Reset Button
This solves most outdoor outlet problems. By code, every outdoor outlet has to be GFCI-protected, either by being a GFCI itself, or by being downstream from a GFCI elsewhere on the circuit.
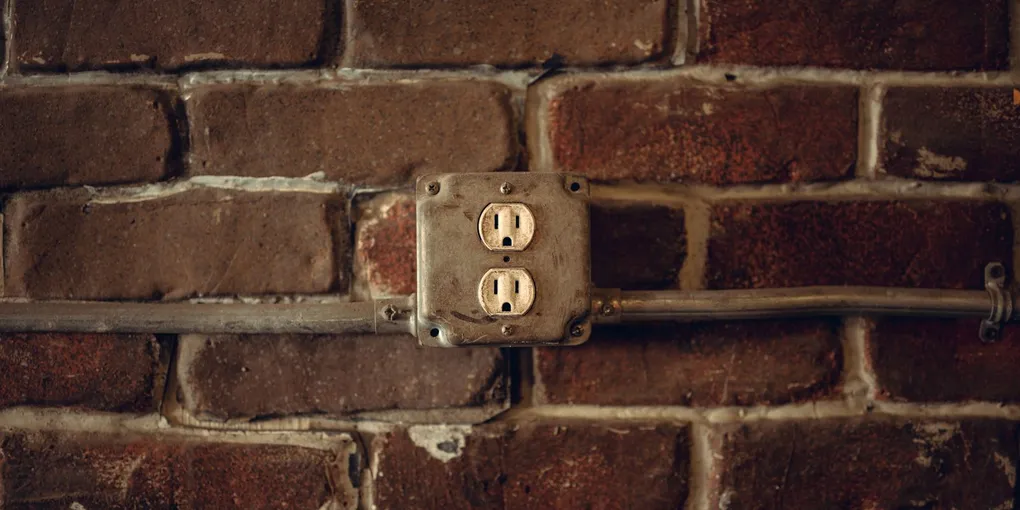
Look at the outlet. Does it have TEST and RESET buttons in the middle?
- Yes, and the RESET button is popped out → it tripped. Press it firmly. You should feel and hear a click. Outlet should work now.
- Yes, and RESET stays popped out (won’t stay in) → something is currently tripping it. See Step 3.
- No (it’s a regular-looking outlet) → it’s protected by a GFCI somewhere else. Continue to Step 2.
For more on GFCI specifically, see how to reset a GFCI outlet.
Step 2: Find the Upstream GFCI
If your outdoor outlet has no test/reset buttons, the GFCI protecting it is somewhere else. Common locations:
- In the garage, most common. Look for an outlet with TEST/RESET buttons on the wall.
- In a bathroom, surprisingly common. Garage and bathroom outlets are often on the same circuit.
- In the breaker panel, some homes use GFCI breakers (look for breakers with a small TEST button on them).
Walk through likely spots. When you find a GFCI with the RESET button popped out, press it. Test the outdoor outlet again.
Step 3: Check What’s Plugged In
If the GFCI keeps tripping immediately when you press RESET, something on the circuit is currently creating a ground fault.
- Unplug everything from the outdoor outlet and any other outlets on the same circuit.
- Press RESET.
- If it stays in now, one of the items you unplugged is the problem. Plug them back in one at a time. The one that trips it is your culprit.
Common offenders:
- Extension cords with damaged insulation
- Wet appliances (pressure washers, pool pumps after rain)
- Old holiday lights with cracked wire jackets
- A wet outlet itself (water inside the outlet box from rain)
Step 4: Check the Breaker
If the GFCI button isn’t popped but the outlet still doesn’t work, the breaker may be tripped.
- Go to your breaker panel.
- Look at all breakers. A tripped breaker sits between ON and OFF, slightly in the middle.
- Flip it fully OFF, then back ON. You should hear a click.
- Test the outdoor outlet again.
If the breaker keeps tripping, see why does my circuit breaker keep tripping.
Step 5: Check the Outlet Cover for Water
Outdoor outlets are protected by a weatherproof cover (in-use cover) or a flip-up cover. If water has gotten inside the outlet box, the GFCI is doing its job by refusing to power on.
- Turn off the breaker for the outdoor circuit at the panel.
- Unscrew the outlet cover.
- Look inside the outlet box for water, moisture, or corrosion.
- If wet: leave the cover off and let it dry overnight, ideally with a small fan blowing into it.
- Once fully dry, replace the cover (consider upgrading to a weatherproof “while-in-use” cover, the kind with the deep bubble, if the existing one is older or cracked).
- Restore power and test.
If you see corrosion (white or green deposits) on the outlet terminals, the outlet itself needs replacement. See Step 6.
Step 6: Replace the Outlet (If Needed)
If the outlet is corroded, scorched, or visibly damaged:
Safety: turn off the breaker. Verify with the voltage tester before touching wires.
- Unscrew the cover and the outlet itself.
- Pull the outlet straight out of the box.
- Note the wire colors and positions (take a phone photo).
- Disconnect wires from the old outlet.
- Connect to the new GFCI outlet in the same configuration:
- Black (hot) on the LINE terminals (incoming power)
- White (neutral) on the LINE terminals
- Any downstream wires on the LOAD terminals
- Bare or green (ground) → green screw
Getting LINE vs LOAD backwards is the most common GFCI wiring mistake on the planet and makes the outlet useless, the GFCI looks installed but doesn’t protect anything. The terminals are clearly marked on the back of the outlet.
- Push the outlet back into the box, screw it in.
- Replace the cover.
- Restore power and test.
- Plug an outlet tester in (the $8 kind with three lights) and hit its test button. If the GFCI trips, wiring is correct. Hit reset, power back. If it doesn’t trip, the wiring is wrong.
For an outdoor outlet, always replace with a GFCI rated for damp or wet locations, look for “WR” (weather-resistant) on the front. A regular indoor GFCI in an outdoor location is a code violation and a real safety issue.
For full step-by-step on the wiring approach, see how to replace an outlet for the complete wiring sequence.
When to Stop and Call an Electrician
- Burning smell, scorch marks, or melted plastic in the outlet box
- The breaker trips immediately even with nothing plugged in and the outlet disconnected
- Wires inside the box look damaged, brittle, or aluminum (older homes)
- You’re not 100% comfortable with the wiring
These are non-DIY situations. An electrician’s hourly rate is cheaper than house-fire damage.
Common Mistakes to Avoid
Skipping the GFCI check. It’s the cause 80% of the time. Always check first.
Pressing RESET repeatedly when something’s actively faulting. A GFCI that won’t stay in is telling you something is wrong. Unplug everything before trying again.
Working on the outlet with the breaker on. Always turn it off, always test with a voltage tester before touching wires.
Replacing a damaged outlet with a non-GFCI version. Outdoor outlets must be GFCI by code. A regular replacement is not just wrong, it’s unsafe.
Wiring LINE and LOAD backwards. The outlet will appear installed but won’t protect anything downstream. Use an outlet tester to verify.
Leaving the outlet cover off after drying. Without the cover, the outlet floods again the next rain.
Frequently Asked Questions
Why did my outdoor outlet work all winter then stop in spring? You probably weren’t using it in winter. Spring’s first use revealed a problem that was already there, likely water damage from winter snow that got inside the box.
The outlet has power but my pressure washer won’t work on it. Pressure washers draw heavy startup current. If the circuit is undersized (15 amp), or the outlet is far from the panel (long wire run), voltage drops too much for the motor to start. Try a closer outlet or a dedicated 20-amp circuit.
My outdoor outlet works in dry weather but trips when it rains. Water is getting into the box. Need a better cover (a “while-in-use” cover with a deep bubble), better caulking around the box, or both.
How long do outdoor outlets last? Quality GFCI outlets in protected boxes: 10-15 years. Cheaper or exposed outlets: 5-7 years.
Can I install a new outdoor outlet myself? Running new wire and adding a new outlet is a more involved electrical job, pulling a permit and getting it inspected is required in most jurisdictions. Most DIYers should call an electrician for new installs and handle only repairs themselves.
What’s the difference between a GFCI outlet and a GFCI breaker? Both provide the same protection from different locations. A GFCI outlet (the kind with TEST/RESET buttons on the face) protects itself and any outlets wired from its LOAD terminals. A GFCI breaker sits in the main panel and protects every outlet on that circuit from the panel forward. Homes with GFCI breakers have plain-looking outdoor outlets because the protection is built into the panel, not the outlet face. This matters for diagnostics: if your outdoor outlet has no TEST/RESET buttons and the steps above didn’t find an upstream GFCI outlet, open the main panel and look for a breaker with a small TEST button on its face. Press RESET on the breaker itself. An electrician can confirm which setup your home uses if you’re unsure; both are code-compliant and equally safe.
An outdoor outlet that’s not working is usually a 30-second fix (GFCI reset), but the diagnostic process is what gets people stuck. Work through it systematically: GFCI on this outlet, GFCI upstream, breaker, what’s plugged in, water in the box. Nine times out of ten, it’s solved before you reach Step 4. The thing about safety upgrades is that nobody ever notices them. The string lights still work. The outlet looks almost the same. But the GFCI sitting quietly inside the box is the cheapest insurance policy you’ve got against an accident with electricity and water.