How to Weatherstrip a Door (Stop the Draft for Good)
Weatherstripping a door cuts your heating bill, blocks bugs, and takes 30 minutes. Every weatherstrip type, V-strip, foam, door sweep, and where to use each.
Quick answer: To weatherstrip a door, find the drafts first with a candle test along the frame perimeter and threshold. Then match material to each leak: V-strip on the sides and top where the door meets the frame (lasts 5+ years), foam tape across the top stop, and a door sweep along the bottom against the threshold. Clean surfaces with rubbing alcohol before applying adhesive-backed materials. A full weatherstrip job runs about $30 and cuts heating and cooling bills by 5-10%.
If you can feel cold air sneaking under or around your front door, you’re paying to heat the outside. Weatherstripping a door is one of the highest-payoff small home projects you can do, it cuts energy bills, blocks dust and bugs, quiets the room, and takes about 30 minutes. The house gets noticeably warmer by dinnertime. The furnace cycles less that night.
What You’ll Need
- A tape measure
- Utility knife (or sharp scissors)
- Pencil
- Phillips and flathead screwdrivers
- Hammer
- Weatherstripping (see types below)
- A door sweep
- Optional: a drill if you’re installing a door sweep with screws
Different types of weatherstripping go in different parts of the door frame. Don’t try to use one type for everything, each is engineered for a specific job.
Step 1: Find the Drafts
Stand inside on a cold or windy day. Hold a lit candle or a thin piece of toilet paper around the door frame, top, sides, threshold. Watch where the flame flickers or the paper moves. Those are your air leaks.
Common locations:
- Bottom of the door, under the door
- Top of the door, where it meets the frame
- Sides, between door edge and frame
- Threshold (sill), where the door meets the floor outside
You may have leaks in multiple spots. Each needs the right type of weatherstrip. While you’re down at the bottom of the door, check for soft or spongy wood at the base of the jamb, if you find rot, fix that before weatherstripping or the new seal won’t hold to crumbling wood.
Step 2: Pick the Right Weatherstrip Type
Walk into any hardware store and the weatherstripping aisle has 20 products. Here’s what each is for.
V-strip (tension seal)
A folded plastic or metal strip that creates a “V” when installed. The V flexes against the door to create a seal.
- Best for: sides and top of the door, where it meets the frame.
- Pros: durable, lasts 5+ years, mostly invisible when installed.
- Cons: slightly harder to install (need to measure correctly).
Foam tape (adhesive-backed foam)
A strip of open or closed-cell foam with adhesive on one side.
- Best for: top of the door, where the door closes against the stop.
- Pros: easiest to install, peel and stick. Cheap.
- Cons: wears out in 1-3 years. Compresses permanently after a season.
Rubber bulb seal
A soft rubber or vinyl bulb attached to a metal or plastic strip with a nail-on or screw-on flange.
- Best for: sides and top, especially on exterior doors with bigger gaps.
- Pros: durable, seals larger gaps than foam or V-strip.
- Cons: visible. Requires nailing or screwing.
Door sweep
A long brush or rubber strip that attaches to the bottom of the door and brushes the threshold.
- Best for: under the door.
- Pros: dramatically blocks drafts under the door. Easy to install.
- Cons: can drag on carpet. Slightly visible.
Threshold seal / door bottom
A bulb-style seal that mounts on the door bottom and seals against the threshold.
- Best for: as alternative to a door sweep, often more durable for high-traffic doors.
- Pros: seals better than a sweep on hard floors.
- Cons: more expensive ($15-30), requires precise fitting.
Step 3: Install V-strip on the Sides and Top
- Measure the height of the door opening on each side and the width at the top.
- Cut the V-strip to length with scissors or a utility knife.
- Open the door.
- Peel the backing from the adhesive side and press the V-strip into the door frame, with the V opening facing out (away from the door). The folded edge presses against the door when it closes.
- Run your finger along the strip to ensure it sticks.
- Close the door and check for resistance. A properly installed V-strip should make the door slightly harder to close (it’s compressing the seal).
For metal V-strip, you’ll need to nail it in place with small brads. Take your time aligning it.
Step 4: Install Foam Tape (Alternative for Sides/Top)
If V-strip seems complicated, foam tape is the no-brainer.
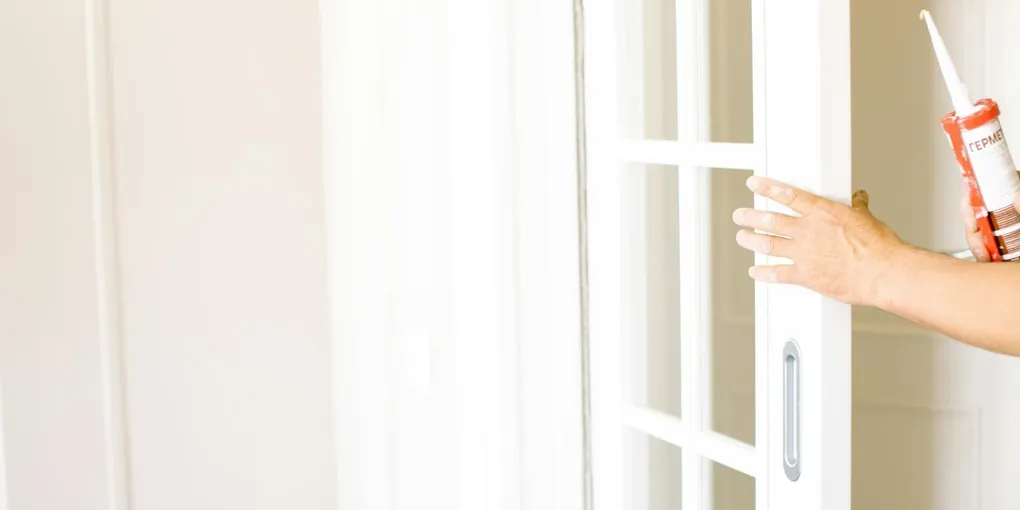
- Clean the door frame surface where the tape will go, wipe with rubbing alcohol to remove dust.
- Cut foam tape to length.
- Peel the backing and press into place along the inside of the door stop (the trim the door closes against).
- The tape should be just thick enough that the door closes firmly but not so thick it doesn’t latch.
Foam tape works but wears out fast. Plan to replace every 1-2 years.
Step 5: Install a Door Sweep on the Bottom
- Measure the width of the door (not the opening, the door itself).
- Buy a door sweep slightly longer than that. You’ll trim to fit.
- Cut to length with a hacksaw or strong scissors (depending on type).
- Open the door.
- Hold the sweep against the bottom inside of the door, brush facing down, just touching the threshold.
- Mark the screw holes with a pencil.
- Drill pilot holes (smaller than the screws).
- Screw the sweep in place.
- Close the door and check. The brush should drag lightly across the threshold, enough to seal, not so much it stops the door from closing.
Most door sweeps have slotted holes, so you can adjust up or down after installation if needed.
Step 6: Install Threshold or Sill Gasket
The actual threshold (the wood or aluminum piece on the floor under the door) often has a rubber gasket on top that compresses against the door when it closes. If yours is flattened, torn, or missing, replace it.
- Pull the old gasket out of its track (usually slides out from one end).
- Cut a new one to length.
- Slide the new one in.
- Test by closing the door, the gasket should compress slightly.
Some thresholds have adjustable height, turn the screws on the threshold to raise it for a tighter seal.
Common Mistakes to Avoid
Using foam tape for everything. Foam tape works on the top (where the door doesn’t slide against it) but wears out fast on the sides and never on the bottom. Use the right material for each location.
Installing too thick. If the door won’t latch after weatherstripping, the seal is too thick. Foam can be compressed by an inch or two, but you need the latch to engage. Test before fully committing.
Skipping pilot holes for screws. Hardwood doors and thresholds will split if you drive screws without pilot holes.
Forgetting to clean the surface first. Adhesive weatherstrip falls off in a month if you stick it on dust or paint flakes. Wipe with alcohol first.
Cutting weatherstrip too short. Always cut slightly long, then trim down. You can’t add length back.
Frequently Asked Questions
How much will weatherstripping save on my heating bill? EPA estimates 5-10% on heating and cooling costs for a properly sealed door. On a $1,800/year heating bill, that’s $90-180 per year for a $20 project.
Do I need to weatherstrip interior doors too? Only if they border unconditioned spaces (garage, attic, unheated room). Otherwise no, there’s no temperature differential to bother sealing.
How often does weatherstripping need replacement? Foam: 1-3 years. V-strip: 5-10 years. Rubber bulb: 10-20 years. Door sweeps: 3-7 years depending on traffic.
Why is air leaking around my new door? New doors sometimes ship with thin or missing weatherstrip. The fix is the same, add the right type for the gap.
Can I weatherstrip a window the same way? Windows use similar materials but different shapes (V-strip and foam still work). Sash windows have specific seal kits.
Weatherstripping pays back faster than almost any other home project. Materials cost $15-40 total. The job takes 30 minutes. The payback shows up on every heating bill for the next decade. Pick the right type for each gap, take your time on the install, and your front door stops being a leak in your home’s envelope.