How to Paint a Room Without Brush Marks
Brush and roller marks ruin an otherwise good paint job. The pro techniques that eliminate them, paint choice, tools, and the specific stroke pattern that works.
Quick answer: To paint a room without brush marks, three things matter most: quality paint with self-leveling additives (Sherwin-Williams Cashmere or Benjamin Moore Regal Select), a quality angled sash brush ($20 Wooster or Purdy), and a 3/8” microfiber roller for smooth walls. Cut in with long single strokes into a wet edge, then roll in 3-foot sections using a W pattern, finishing with full vertical strokes ceiling to floor. Lightly sand with 220-grit first, and let each coat dry 4 hours.
You finish painting the bedroom. It looks great that night. The next morning, in raking sunlight, you see them, streaky brush marks along the trim, roller stipple on the wall, lap marks where you blended sections. A painted surface should be glass-smooth and uniform; yours looks like you were in a hurry.
I painted our hallway last October in a deep mossy green that Megan had been carrying around as a paint chip for three weeks. Hallways are deceptively annoying, narrow, long, full of doorframes and light switches and a thermostat, with cuts that have to be sharp because there’s nowhere for sloppy work to hide. The first wall came out fine. The second wall, in afternoon raking light, showed every roller mark from the first wall. I went back, sanded lightly, primed over with a tinted gray, did the full W pattern with a 3/8” Purdy White Dove, and finished with vertical strokes ceiling to floor. By dinnertime you couldn’t see a stroke anywhere. That’s the whole technique. Seven specific moves below.
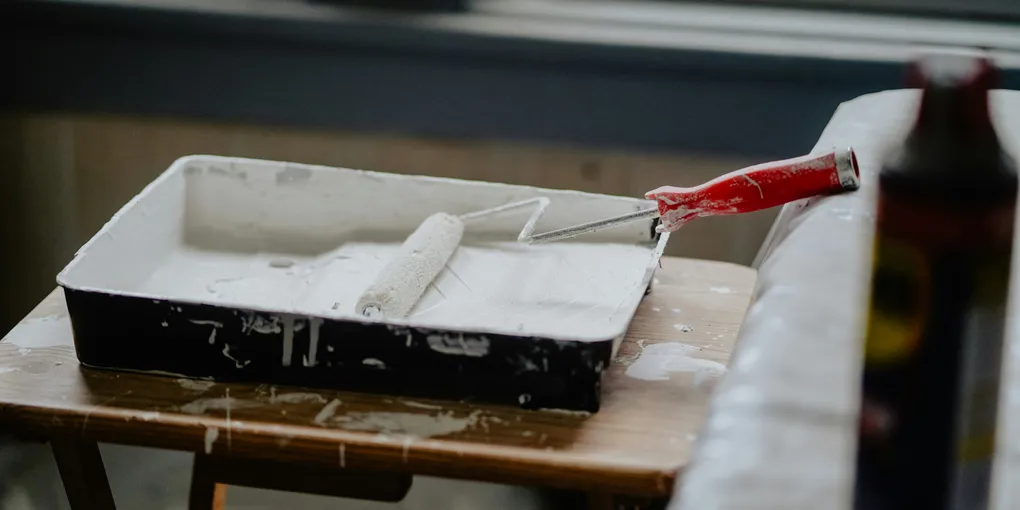
What You’ll Need
- Quality paint (this matters, see Tip 1)
- A 9-inch roller frame
- A 3/8” nap microfiber roller cover (for smooth walls; 1/2” for textured)
- A 2.5-inch angled sash brush, a quality one (Wooster or Purdy)
- A roller tray with a liner
- Painter’s tape
- Drop cloths
- Sandpaper (220-grit)
- A clean rag
The two most-skipped tools are quality paint and a quality brush. Both are upgrades that pay for themselves in eliminated re-paints.
Tip 1: Buy Quality Paint
This is the single biggest factor. Cheap paint has fewer solids and binders, so it dries flat and unevenly, and shows every stroke. Mid-range and premium paint contains more pigment and self-leveling additives that flatten brush and roller marks as it dries.
What to buy:
- Premium: Sherwin-Williams Emerald or Cashmere, Benjamin Moore Aura
- Mid-range: Sherwin-Williams Cashmere, Benjamin Moore Regal Select
- Avoid: Hardware store bargain brands, builder-grade paint
Expect to pay $50-70 per gallon. Skip it and you’ll see the grain and brush strokes through the top coat the first time the morning sun hits the wall.
Tip 2: Use the Right Sheen
Higher-sheen paints (semi-gloss, satin) show brush marks more than lower-sheen (eggshell, matte). For most walls, eggshell or matte hides marks while still being washable. For trim and doors, semi-gloss is standard but requires more careful technique.
If you’re nervous about brush marks, default to eggshell on walls, it’s forgiving.
Tip 3: Sand Before You Paint
Texture telegraphs through paint. A rough wall (even microscopically rough) creates uneven absorption and visible stippling.
- Lightly sand walls with 220-grit before painting.
- Pay attention to old paint drips, runs, and patched areas.
- Wipe with a damp rag to remove dust.
- Let dry before painting.
This step takes 20 minutes and dramatically improves the finish.
Tip 4: Buy a Quality Brush
A $4 brush sheds bristles, loads paint unevenly, and leaves obvious lines. A $20 brush carries paint smoothly, has consistent bristle density, and self-levels.
A Purdy or Wooster 2.5-inch angled sash brush is what to look for. It’ll last for dozens of paint jobs if you clean it properly after each use.
Sash brushes are better than wider brushes for most jobs, easier to control around trim and corners.
Tip 5: The Brushing Technique
How you move the brush matters as much as the brush itself.
- Don’t overload the brush. Dip the bristles in paint about 1 inch deep. Tap off excess on the inside of the can, don’t drag across the rim.
- Brush in long, single strokes. Start from a dry area and brush into a wet area. Don’t lift the brush mid-stroke.
- Maintain a wet edge. Always paint into still-wet paint. If a stroke dries before you paint next to it, you’ll see a lap mark.
- Tip off at the end. The final pass over an area should be a single, light, full-length stroke. This is called “tipping off” and is the secret to a glass-smooth finish.
For trim and woodwork, brush with the grain, long strokes following the wood direction.
Tip 6: The Rolling Technique
Roller marks show up as visible stippling, ridges along the roller edge, or unevenly stippled patches.
- Use the right nap. 3/8” microfiber for smooth walls. Don’t use a thicker nap unless your walls are textured, thick nap leaves visible texture on flat walls.
- Load the roller properly. Roll it back and forth in the paint tray reservoir until it’s saturated but not dripping.
- Paint in 3×3 foot sections. Larger sections give you wet edges to blend into.
- Use a W or M pattern. Roll the loaded paint up and down in a W shape across the section without lifting the roller. Then go back over the section vertically, edge to edge, to even out the coverage.
- Don’t press too hard. Light pressure spreads paint evenly. Hard pressure squeezes paint out the sides of the roller and creates ridges.
- Always end strokes in the same direction. The last pass over every section should be straight vertical, ceiling to floor, never partial strokes.
Tip 7: Use a Paint Conditioner (For Trim Especially)
Floetrol (for latex) and Penetrol (for oil) are paint conditioners that extend “open time”, the period when paint is wet enough to self-level. Adding a small amount (per the bottle, usually about 10% by volume) to your paint dramatically reduces brush marks on trim, doors, and cabinetry.
Don’t use too much, it changes the paint consistency. Follow the bottle.
Step-by-Step: A Brush-Mark-Free Wall
Putting it all together:
- Tape off baseboards and trim.
- Lightly sand the wall, wipe clean.
- Cut in (paint along edges) with a quality angled brush. Long, smooth strokes.
- While the cut-in is still wet, start rolling the wall.
- Roll in 3-foot sections using the W pattern.
- Always end with vertical strokes from ceiling to floor.
- Move on to the next section quickly, overlapping into wet paint.
- Let dry 4 hours before second coat.
- Apply the second coat the same way.
- Pull the tape while the second coat is still slightly tacky so the lines come up clean.
Two coats is the right amount. Three coats is for problem walls (lots of patching, color change). One coat is rarely enough no matter what the can says.
Common Mistakes to Avoid
Painting in extreme conditions. Hot, dry air dries paint too fast and prevents self-leveling. Humid air slows drying and creates drips. Paint at 60-75°F with moderate humidity.
Brushing back over half-dry paint. Once paint has started to skin over, leave it alone. Brushing over it now creates ugly streaks.
Using the wrong roller for the surface. Thick nap on smooth walls = stippling. Thin nap on textured walls = poor coverage.
Skipping primer on new drywall or patches. Joint compound absorbs paint differently, so the patch shows through. Always prime first.
Rushing. Brush marks come from rushed, irregular strokes. Slow down. The job is faster when you’re not redoing it.
Losing the wet edge. If you stop mid-wall for more than a few minutes, the cut-in or rolled section starts to skin over. Painting back into dried paint always leaves a lap mark visible in raking light. Work through each wall continuously. If you have to stop, finish the section you’re on completely before setting the brush down.
Frequently Asked Questions
Should I use a paint sprayer? For experienced users with cabinets or trim, yes, sprayed finishes are mark-free. For walls, brush + roller is faster than the masking and cleanup of spraying.
Why do brush marks show only in certain light? Raking light (low-angle sunlight, shadows from lamps) reveals texture that’s invisible in flat light. A well-done paint job looks smooth in any light.
Are oil-based paints smoother than latex? Yes, oil-based paints flow and level beautifully. But they smell, take days to dry, and require solvents to clean up. Modern premium latex is nearly as smooth without the downsides.
My old roller works fine, do I really need a new one? A roller that has been used and washed gradually loses fibers and even nap. A new cover for each room is a $4 investment for a much better finish.
How long should I wait between coats? 4 hours minimum for latex; the can will tell you. Don’t recoat sooner, you’ll lift the first coat. Don’t wait too long either, overnight is fine, but multi-day waits can cause adhesion issues.
I can see brush marks after the paint dried. Can I fix it now? Yes, but do it before the second coat. Let the first coat dry fully (4 hours minimum), then sand lightly with 220-grit to knock down the ridges. Don’t sand through, just smooth. Wipe with a damp rag, let dry, then apply the second coat with the correct technique. Sanding between coats is standard practice on professional paint jobs anyway. If the marks are severe, a thin coat of tinted primer before the second topcoat fills the texture better than paint alone.
Brush marks aren’t a sign of lack of talent, they’re a sign of using the wrong paint, wrong tools, or wrong technique. Upgrade those three things (quality paint, quality brush, the right roller and the W pattern) and the next room you paint looks like it was done by a pro. The whole upgrade costs about $30 more than bargain options, and the finish difference is obvious the first morning the sun hits the wall at an angle.