How to Fix Garage Door Sensors That Won't Let the Door Close
When your garage door closes a foot, then reverses, the photo sensors are out of alignment, dirty, or wired wrong. Five-minute fix, no service call needed.
Quick answer: Nine times in ten, a garage door that closes a foot and reverses is a photo sensor problem. The two sensors mounted 4 to 6 inches off the floor have to see each other. If one is bumped, dirty, or hit by direct sun, the opener treats it as something blocking the path and reverses. Check the LED on each sensor first. Steady green on the sending side and steady amber (or red) on the receiving side means good. A flashing or dark LED means the fix is below. Most cases are a 30-second realignment and a wipe of the lens.
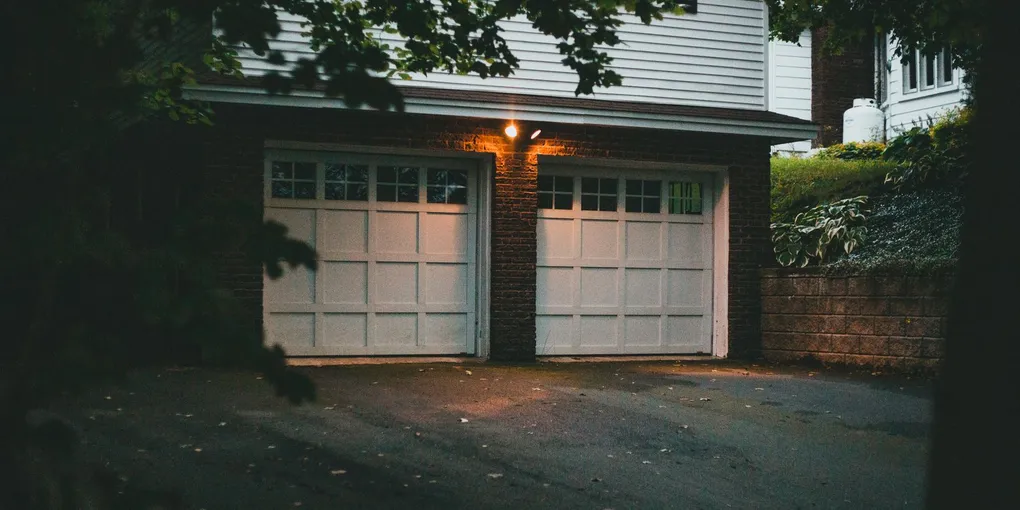
The two little boxes mounted near the floor on each side of the garage door are called photo eyes. They’ve been federally required on every residential opener since 1993 (UL 325, after a string of deaths from doors closing on kids), and they’re the part of the system that fails most often. Not because they’re delicate, but because they live four inches off a concrete floor where they get kicked, hit by a leaf blower, splattered with mud, and sun-glared every spring evening.
Before paying $80 to $150 for a service call, work through the diagnostic below. Nine times in ten, the fix is something you can do without any tools.
Read the LEDs Before You Touch Anything
Each sensor has a small LED on the back. The pattern tells you exactly where the problem is.
- One side solid, other side solid: Sensors are happy. The reverse is coming from somewhere else (Steps 4 and 5 below).
- One side solid, other side flashing or off: Misalignment. Most common case. Step 2.
- Both sides off: No power. A wire is loose, cut, or one sensor is dead. Step 3.
- Both sides flashing: Wiring short. Step 3.
LiftMaster and Chamberlain (same parent company, most of the market) use green on the sending side and amber on the receiving side. Genie uses red on both. Different colors, same rules: solid is good, anything else is the problem.
What You’ll Need
- A clean microfiber cloth or paper towel
- A drop of dish soap and warm water
- A Phillips screwdriver (for the bracket wing nut, if used)
- A small piece of cardboard or a beach towel, optional, for the sun-glare test
- A voltage tester or multimeter, optional, only if you’ve made it to Step 3
Five-dollar diagnostic at most. Whole thing takes 15 minutes.
Step 1: Clean the Lenses
Spider webs love photo sensors. So does dust, lawn fertilizer kicked up by the mower, and the film of road grime that settles on everything in a garage.
Wipe both lenses with a damp microfiber cloth. One drop of dish soap if there’s grease. Dry with a clean side of the cloth. Don’t use Windex or anything with ammonia, it’ll fog the plastic over time.
While you’re down there, look at the lenses for cracks. A cracked lens still lets enough light through that the LED reads as fine, but the beam scatters and the door reverses on a sunny day for no reason. A new pair of sensors runs $35 to $50 (LiftMaster 41A5034 fits most of their openers; Chamberlain G801CB-P is the kit for the Chamberlain side).
Test the door. If it closes now, that was it.
Step 2: Realign the Brackets
This is the most common fix. The sensors are mounted on small metal brackets screwed to the bottom of the door track. The brackets bend easily. A broom handle catches one. A kid’s bike bumps it. You shovel snow against it. Now the two sensors don’t quite see each other anymore.
Look at one sensor. Sight along its lens to the other sensor across the opening, the way you’d line up a rifle scope. They should point directly at each other.
Loosen the bracket wing nut on each sensor (some use a small screw instead). Swivel the sensor body until the LED on the receiving side goes solid. Hand-tighten the wing nut while holding the position. The light should stay solid.
A small trick that saves grief: tap the bracket gently with a fingertip after you tighten. If the light flickers, the bracket is bent slightly and the tension on the wing nut is the only thing holding alignment. Bend the bracket flat with both hands, then re-align. A bracket under tension drifts back out within a week.
The receiving sensor is the picky one. The sending side just throws a beam, the receiver has to read it. Align by adjusting the receiver first.
Test the door.
Step 3: Check the Wiring
If both LEDs are dark or both are flashing, the problem isn’t alignment, it’s the low-voltage wiring that runs from the opener motor head down each side of the door to the sensors.
This is bell wire, the thinnest wire in the garage, usually white and tan or white and brown stapled along the door frame. It’s a 24-volt low-voltage circuit, no shock risk, but the wires are easy to nick with a staple, snip with hedge trimmers, or pull loose at the terminal screws.
- Trace the wire from each sensor back to the motor head on the ceiling.
- Look for nicks where staples were driven through, breaks where the wire bends sharply, and chewed sections (mice love this stuff).
- At the motor head, two terminals are labeled for the sensor wires (usually white and gray, or white and another color depending on the brand). Confirm both are seated and the wire isn’t broken right at the terminal.
Loose terminal connections are common after a few years of vibration. Loosen each terminal, push the bare wire end back in, retighten. Some wires get oxidation on the copper, snip half an inch off and strip fresh wire if the existing end is dull or green.
If you find a damaged section, splice it with a wire nut and electrical tape. The voltage is so low that any clean splice works.
Step 4: The Sun Glare Problem
This one drives people nuts because the door works perfectly all morning, then refuses to close from 4 p.m. to sunset for two weeks every spring.
Direct sunlight hitting the receiving sensor washes out the beam. The sensor reads “no signal” even though the beam is fine, and the door reverses.
Hold a piece of cardboard or a beach towel between the sun and the receiving sensor at the time it’s failing. If the door closes, sun glare is your answer.
Two fixes:
- Make a small shade for the affected sensor. A 3-inch piece of black PVC pipe cut lengthwise and zip-tied over the lens works (you can see this on commercial openers, where they ship with built-in shades for this exact reason).
- Swap the sending and receiving sensors side-to-side. The transmitter is harder to wash out than the receiver, so putting the transmitter on the sun-facing side often solves it.
The seasonal pattern of an opener that “fixes itself” by 7 p.m. is the giveaway here.
Step 5: When the Reverse Isn’t the Sensors
Sometimes the LEDs are solid, the alignment is perfect, the lenses are clean, and the door still closes part-way and reverses. The opener has a separate safety system besides the photo eyes, called force adjust, that reverses the door if it hits resistance on the way down.
If the door reverses at the same spot every time, something is in the door’s path: a rake handle leaning into the swept area, a tire too close to the closing zone, a worn roller binding on the curve in the track. Stand at the door, watch where it reverses, find what it touched.
If the door reverses at a different spot each time, the force-adjust setting on the opener has drifted. There are two screws on the back of the motor head labeled “Open Force” and “Close Force.” Turn the close-force screw clockwise a quarter-turn at a time, testing between adjustments, until the door closes consistently. The Department of Energy and CPSC both warn against over-tightening this, the door has to reverse on a real obstruction, so set it just sensitive enough to close without false reverses on a clean track. If you can stop the door with steady hand pressure on the bottom edge, the setting is right.
Common Mistakes to Avoid
Holding the wall button to override the sensors. Most openers let you bypass the photo eyes by holding the wall button continuously while the door closes. That’s an intentional design choice for cases like a sensor failure during a storm. It’s also how kids and pets get hurt. The sensors exist for a reason, fix them, don’t bypass them for daily use.
Buying new sensors before re-aligning. New sensors come out of the box with the same alignment problem the old ones have. The brackets are what’s bent, not the sensors themselves. Re-align first. Replace only if a lens is cracked or the LED stays dark with confirmed power.
Pulling the red emergency cord to “fix” the door. The red cord disengages the opener trolley so you can lift the door by hand. It doesn’t reset the safety system. If you pull it and then re-engage it, the same problem comes back.
Using ammonia-based cleaner on the lenses. It fogs the plastic over months. Soap and water, dry with microfiber.
FAQ
Why does my door only fail in the afternoon? Sun glare washing out the receiving sensor. Walk to the door when it’s failing and watch where the sun hits. A small cardboard shade on the receiving sensor (or swapping the sensors side-to-side) usually solves it. The pattern of seasonal-only failures is a giveaway.
Can I just disconnect the sensors permanently? You can wire-jump the sensor terminals at the motor head, and yes, the door will close again. It’s also a code violation in every state, voids the opener’s UL listing, and creates real risk if anything ever ends up in the door’s path. The whole reason photo eyes are mandatory is the body count before they existed.
My door closes 6 inches and reverses. Is this the sensors? Probably not. Sensors trigger an immediate reverse from anywhere in the path. A consistent 6-inch reverse is the down-limit or force-adjust setting. See Step 5. If it reverses inconsistently, it’s the sensors.
How much does it cost to replace photo sensors? $35 to $50 for a matched pair from the original manufacturer. Generic kits are $20 but don’t always communicate cleanly with the opener’s logic board. If you’re replacing them, stick with the matching brand: LiftMaster, Chamberlain, Genie, or Craftsman (Craftsman openers were made by Chamberlain, so Chamberlain parts fit).
Do all garage door openers have photo sensors? Every residential opener manufactured for U.S. sale since January 1, 1993, has them. If you have an older unit without sensors, the opener itself is now older than the federal safety standard and is worth replacing for that reason alone. A new belt-drive opener with sensors runs $250 to $400 installed, and a new opener with modern soft-start motor is also noticeably quieter than a 30-year-old chain drive.
My door works with the remote but not the wall button. Is that the sensors? No, that’s the wall button or its wiring. The sensors affect closing, not the source of the signal. Check the wall button battery (some are wireless now) and the two-wire connection to the motor head.
Most “garage door won’t close” calls come down to clean the lenses, bend the bracket back, re-aim. The same kid’s bike that knocked the bracket out of alignment last spring is going to knock it again next fall, which is why I leave the wing nut just snug enough to hold without crushing, easy to re-align in 30 seconds without tools.
If you’ve also got a door that grinds or jerks on the way down, see our garage door that won’t close guide for the mechanical side, and if the door is sagging or sitting cockeyed on the track, the off-track diagnostic covers when it’s still a DIY situation and when to call.